![]()

|
|
|
|
|
|
|
|
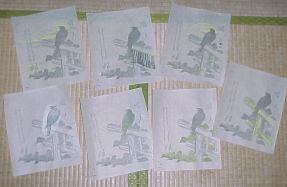
I then sat down with a fluorescent marker, and 'coloured in' on each sheet the areas where the wood is to remain untouched on that block. There are to be eight colour 'blocks' for this print (clockwise from top left in this photo):
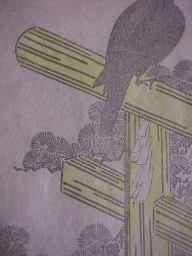
Here's a closeup of one of the sheets (which are known as 'kyogo'). The yellow of course has no connection at all with the colour that will appear there in the final print; I chose it simply because it is an easy-to-see shade. These kyogo are then pasted down on some fresh blocks. Because two of them (the ones that will print the crow's body and the embossing for the feathers) only use a very small part of the block surface, I managed to 'squeeze' them both onto one surface, pasting them down heads-and-tails. In this way, the seven sheets go on three pieces of wood (using both sides ...)
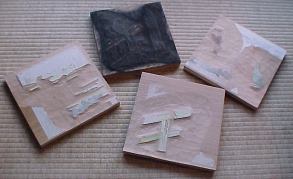
Here are the finished colour blocks, with the paper not yet washed off. I started in the morning, and worked through the day, but wasn't quite able to finish the last one that evening. It was finished off this morning. There is nothing carved on the reverse side of the key blocks (to maintain a solid thickness to avoid warping on this critical block), but the colour blocks are carved on both sides. If they should warp a bit, that can be corrected during the printing process by using warm water and a towel applied to the concave surface ... Can you also see (top right) the block with the two colour areas carved on it ... heads and tails?
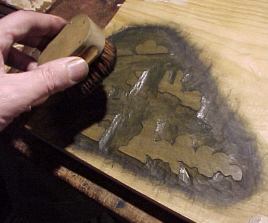
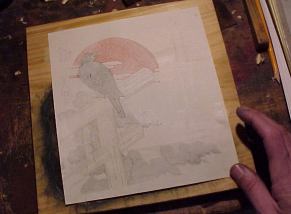
Printing has now begun. This is the block for the dark green pine needles. Notice that because the pigment is mostly transparent, the colour of the wood shows through quite a lot. It's almost impossible to tell by looking at this just what colour will appear on the print, where rather than a 'woody coloured' background showing through the pigment, there will be the white background of the paper. The printing 'formula' is straightforward: place a dab of paste on the wood, follow it with a smear of pigment, then mix them together with the brush (as in the photo). When they are well mixed and spread evenly over the carved surfaces, make a few gentle strokes to remove the brush marks.
Lay the paper in place face down on the block. (This actually takes two hands, not one, but I had to hold the camera!) My thumb is covering the point where the corner of the paper has slipped into the L-shaped registration mark. Note also how much of the pigments are showing through to this, the reverse surface of the print. The pressure of the baren really drives the paste/pigment mixture right up in between the fibres of the paper. I am using pretty thick paper for this print (to get a good embossing), but the pigment still 'fills it up' like this.
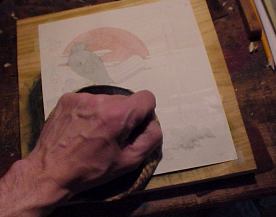
The motion is 'small tight circles', with the baren also moving in wider pattern so that the entire area of this particular block is covered. It's pretty firm pressure, and when you consider that this paper is wet, it's amazing that it doesn't collapse under the rubbing. The paper is kept moist throughout the entire printing process. If dry paper was used, the pigments simply wouldn't be driven into the body of the paper properly. It's also important for the registration: dry paper would expand as it absorbed the wet pigment, and subsequent blocks wouldn't register properly.
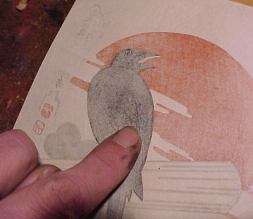
The final block is a 'karazuri' (empty printing) of the feather pattern. The block is used with no pigment or paste at all. I rub with the baren first the emboss the lines strongly into the paper, and then rub with my finger to cause the body of the crow to 'stand out' even more (which makes this technically a 'kimedashi', not a karazuri).
|
|
How the Prints are Made | Completed Albums | Subscriptions |
|
|
|
|
|
|
|
|